Making my own headboard was on my to-do list for a few weeks. Follow along with my step-by-step instructions and pictures.
I picked out the fabric, I collected the materials, and one October afternoon, I decided to get the headboard done!
Here are the materials I used:
- Cardboard (I used the cardboard from some Ikea furniture I bought)
- Batting ($5 per yard from a foam store on Ottawa St N, Hamilton)
- Buttons ($8 for buttons from Nova, a store on Ottawa St N, Hamilton)
- Fabric ($10 for 2.5 yards at Fabricland)
- Glue (I used caulking and a caulking gun I had laying around)
- Staples ($2, I used a borrowed staple gun and bought the staples)
- Tape ($5 duct tape and double-sided, heavy-duty mounting tape)
- Exacto knife
- Paint sticks
- Thick needle
- Strong string
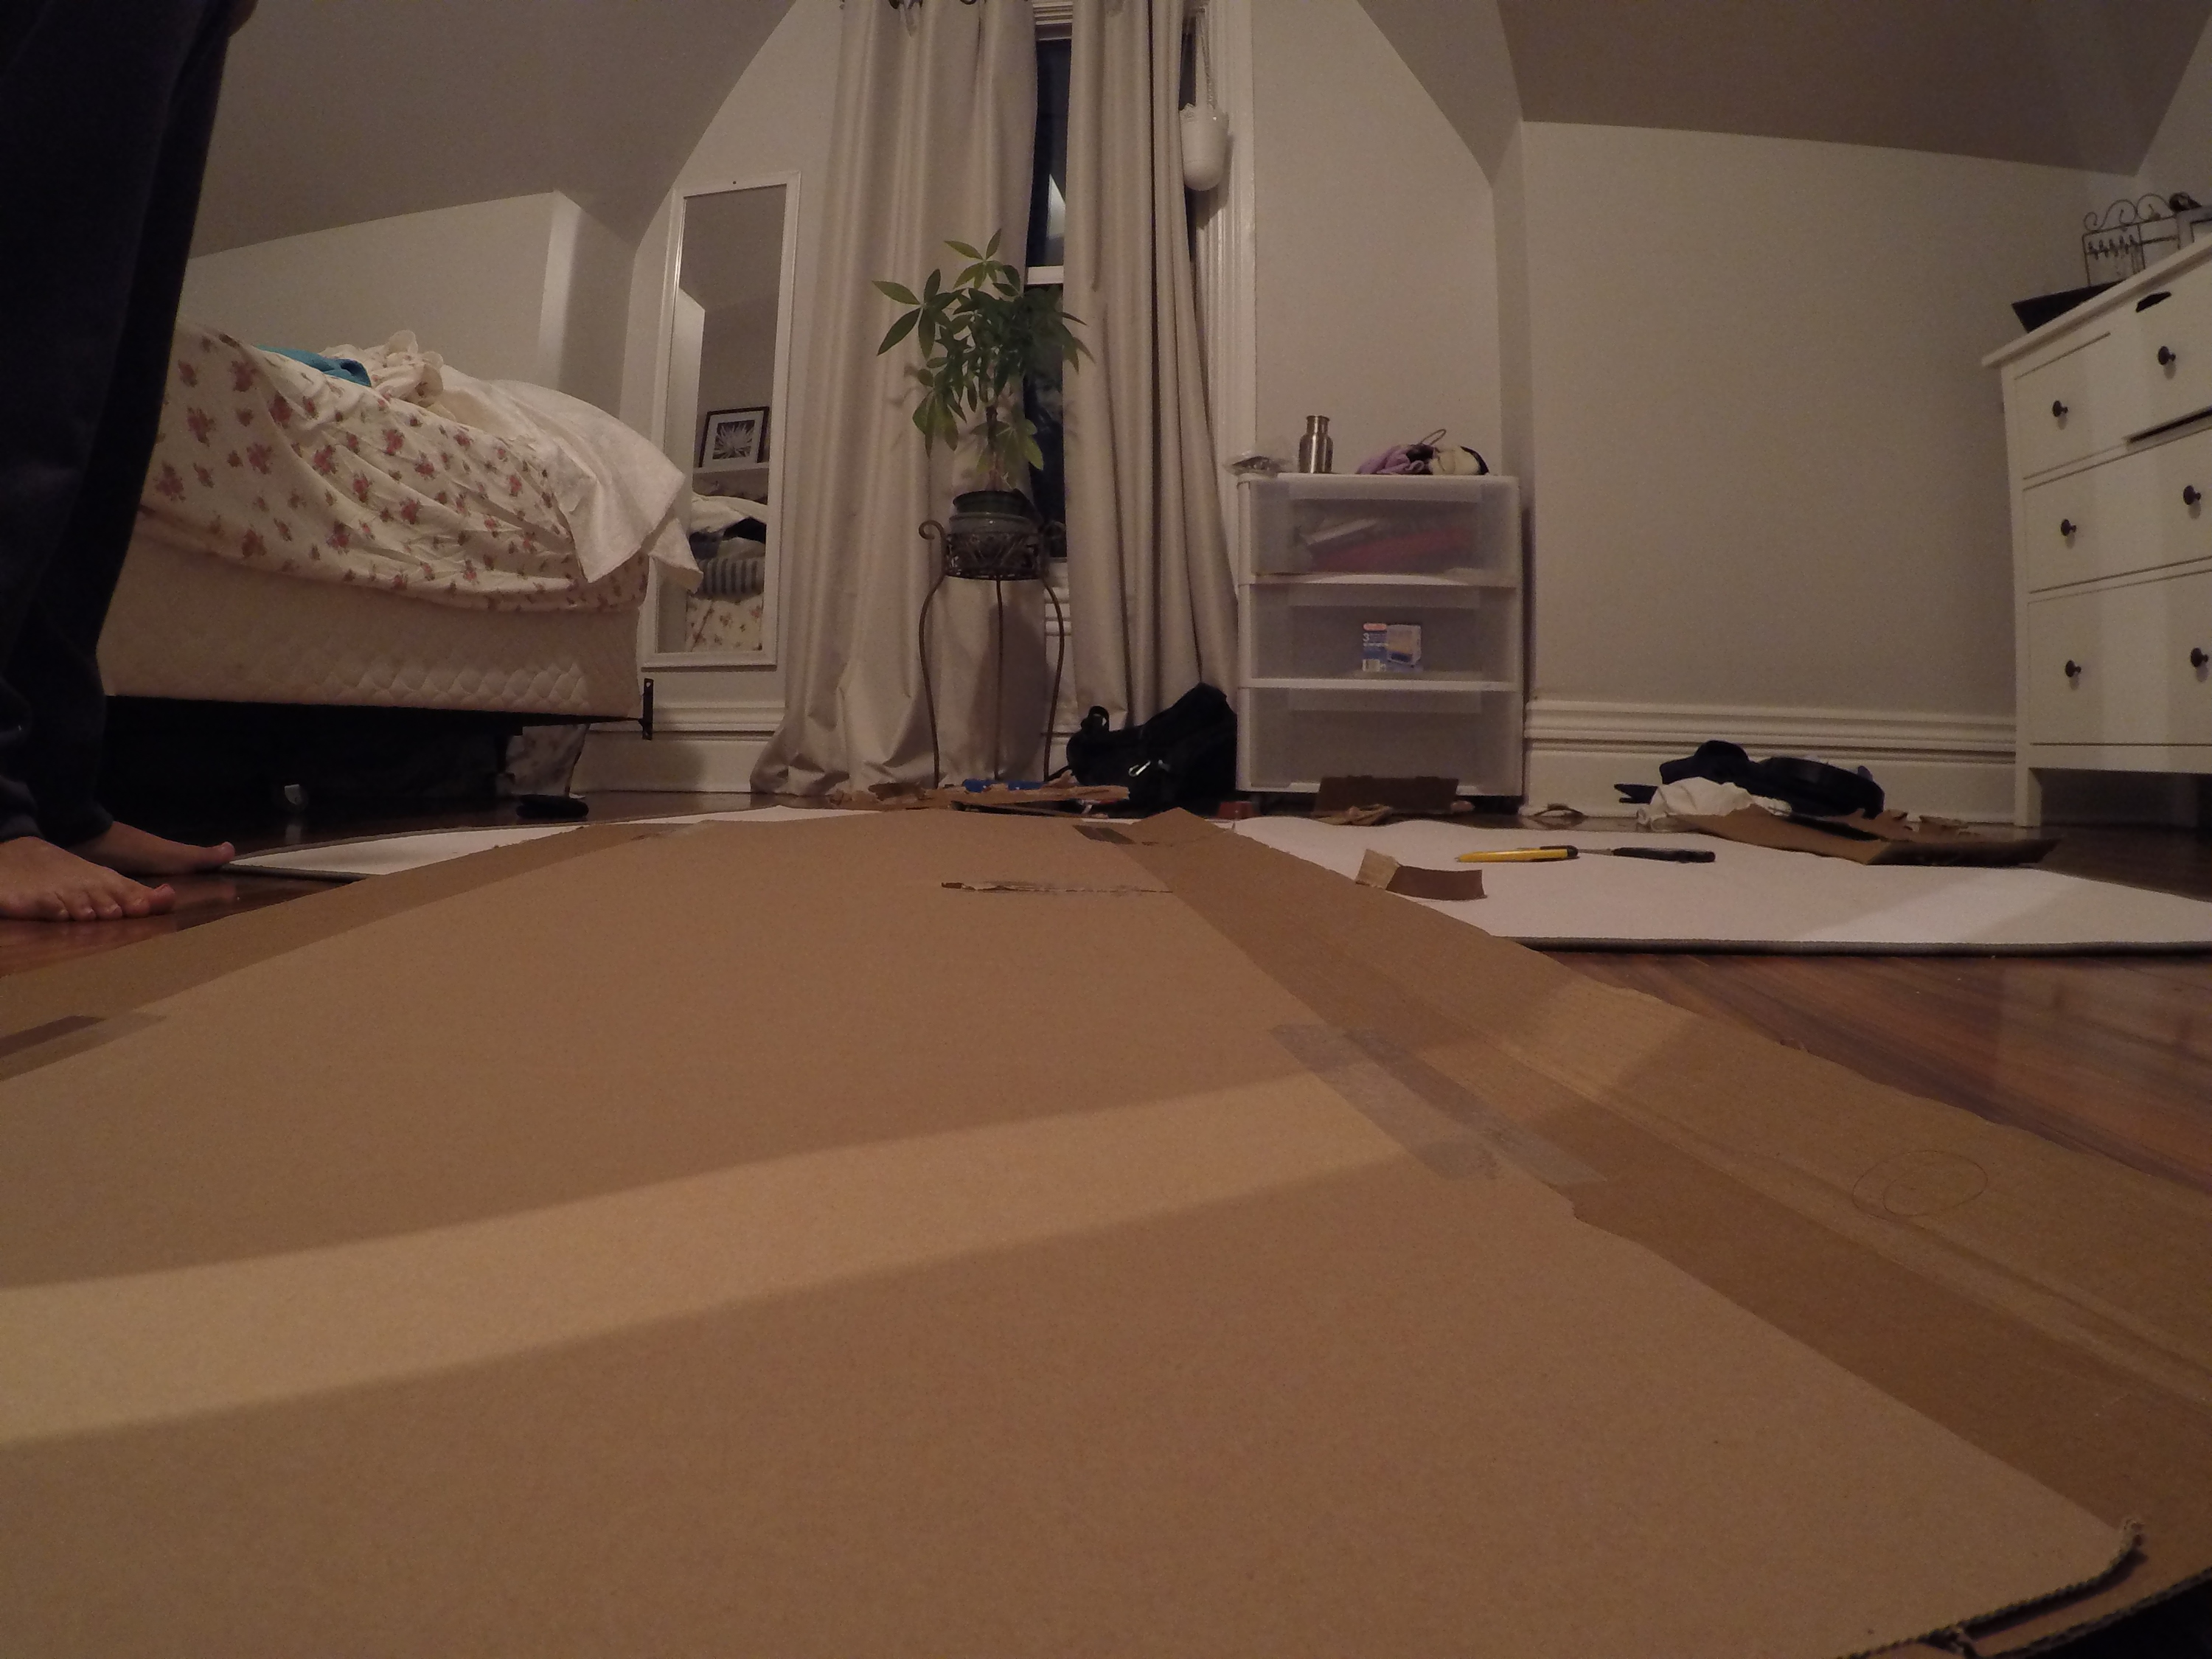
Step 1: Cut the cardboard to the size you want
- I used two pieces of sturdy cardboard. For next time, I would use thin wood because the staples didn’t hold as well on the cardboard.

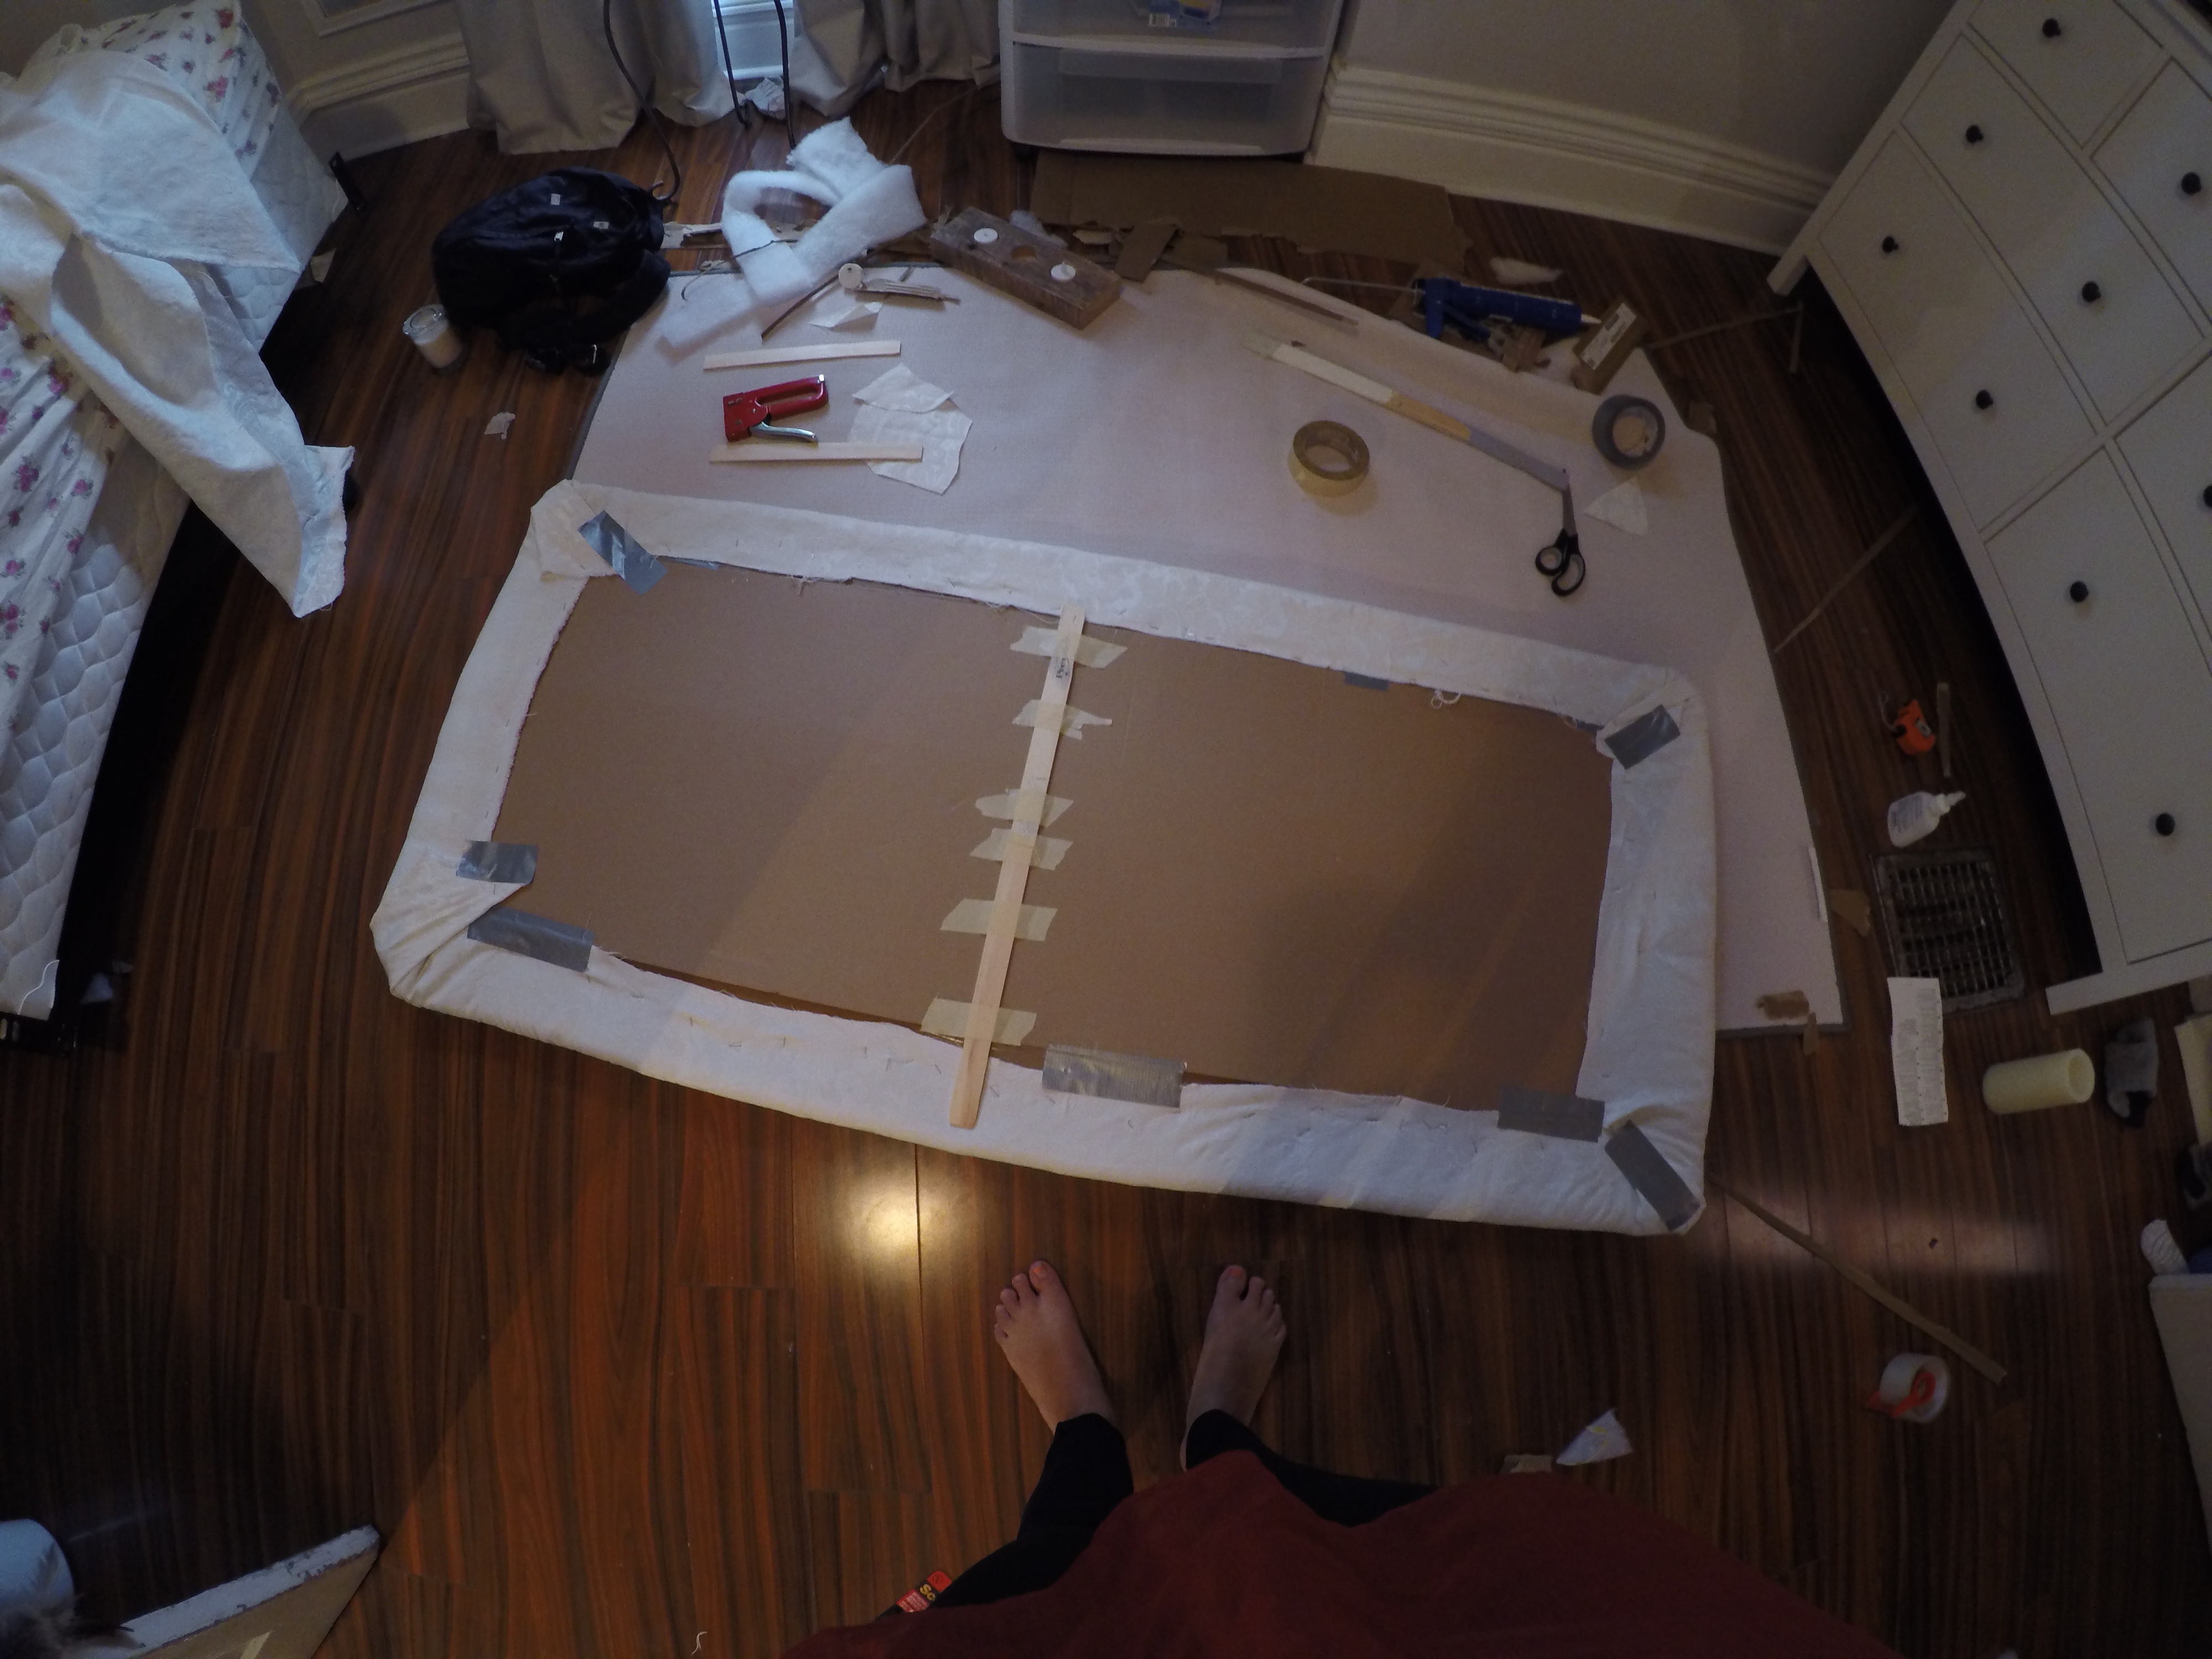
Step 2: Cut and glue batting
Batting is like cotton candy as it is thin, cheap and fluffy. I did not measure anything so it was quite tight. I used silicon caulking to glue the batting onto the cardboard but use any strong glue you have laying around.

Step 3: Staple and tape the fabric
I stapled the fabric onto the cardboard but that was not working as well as I wanted. Duct tape to the rescue!
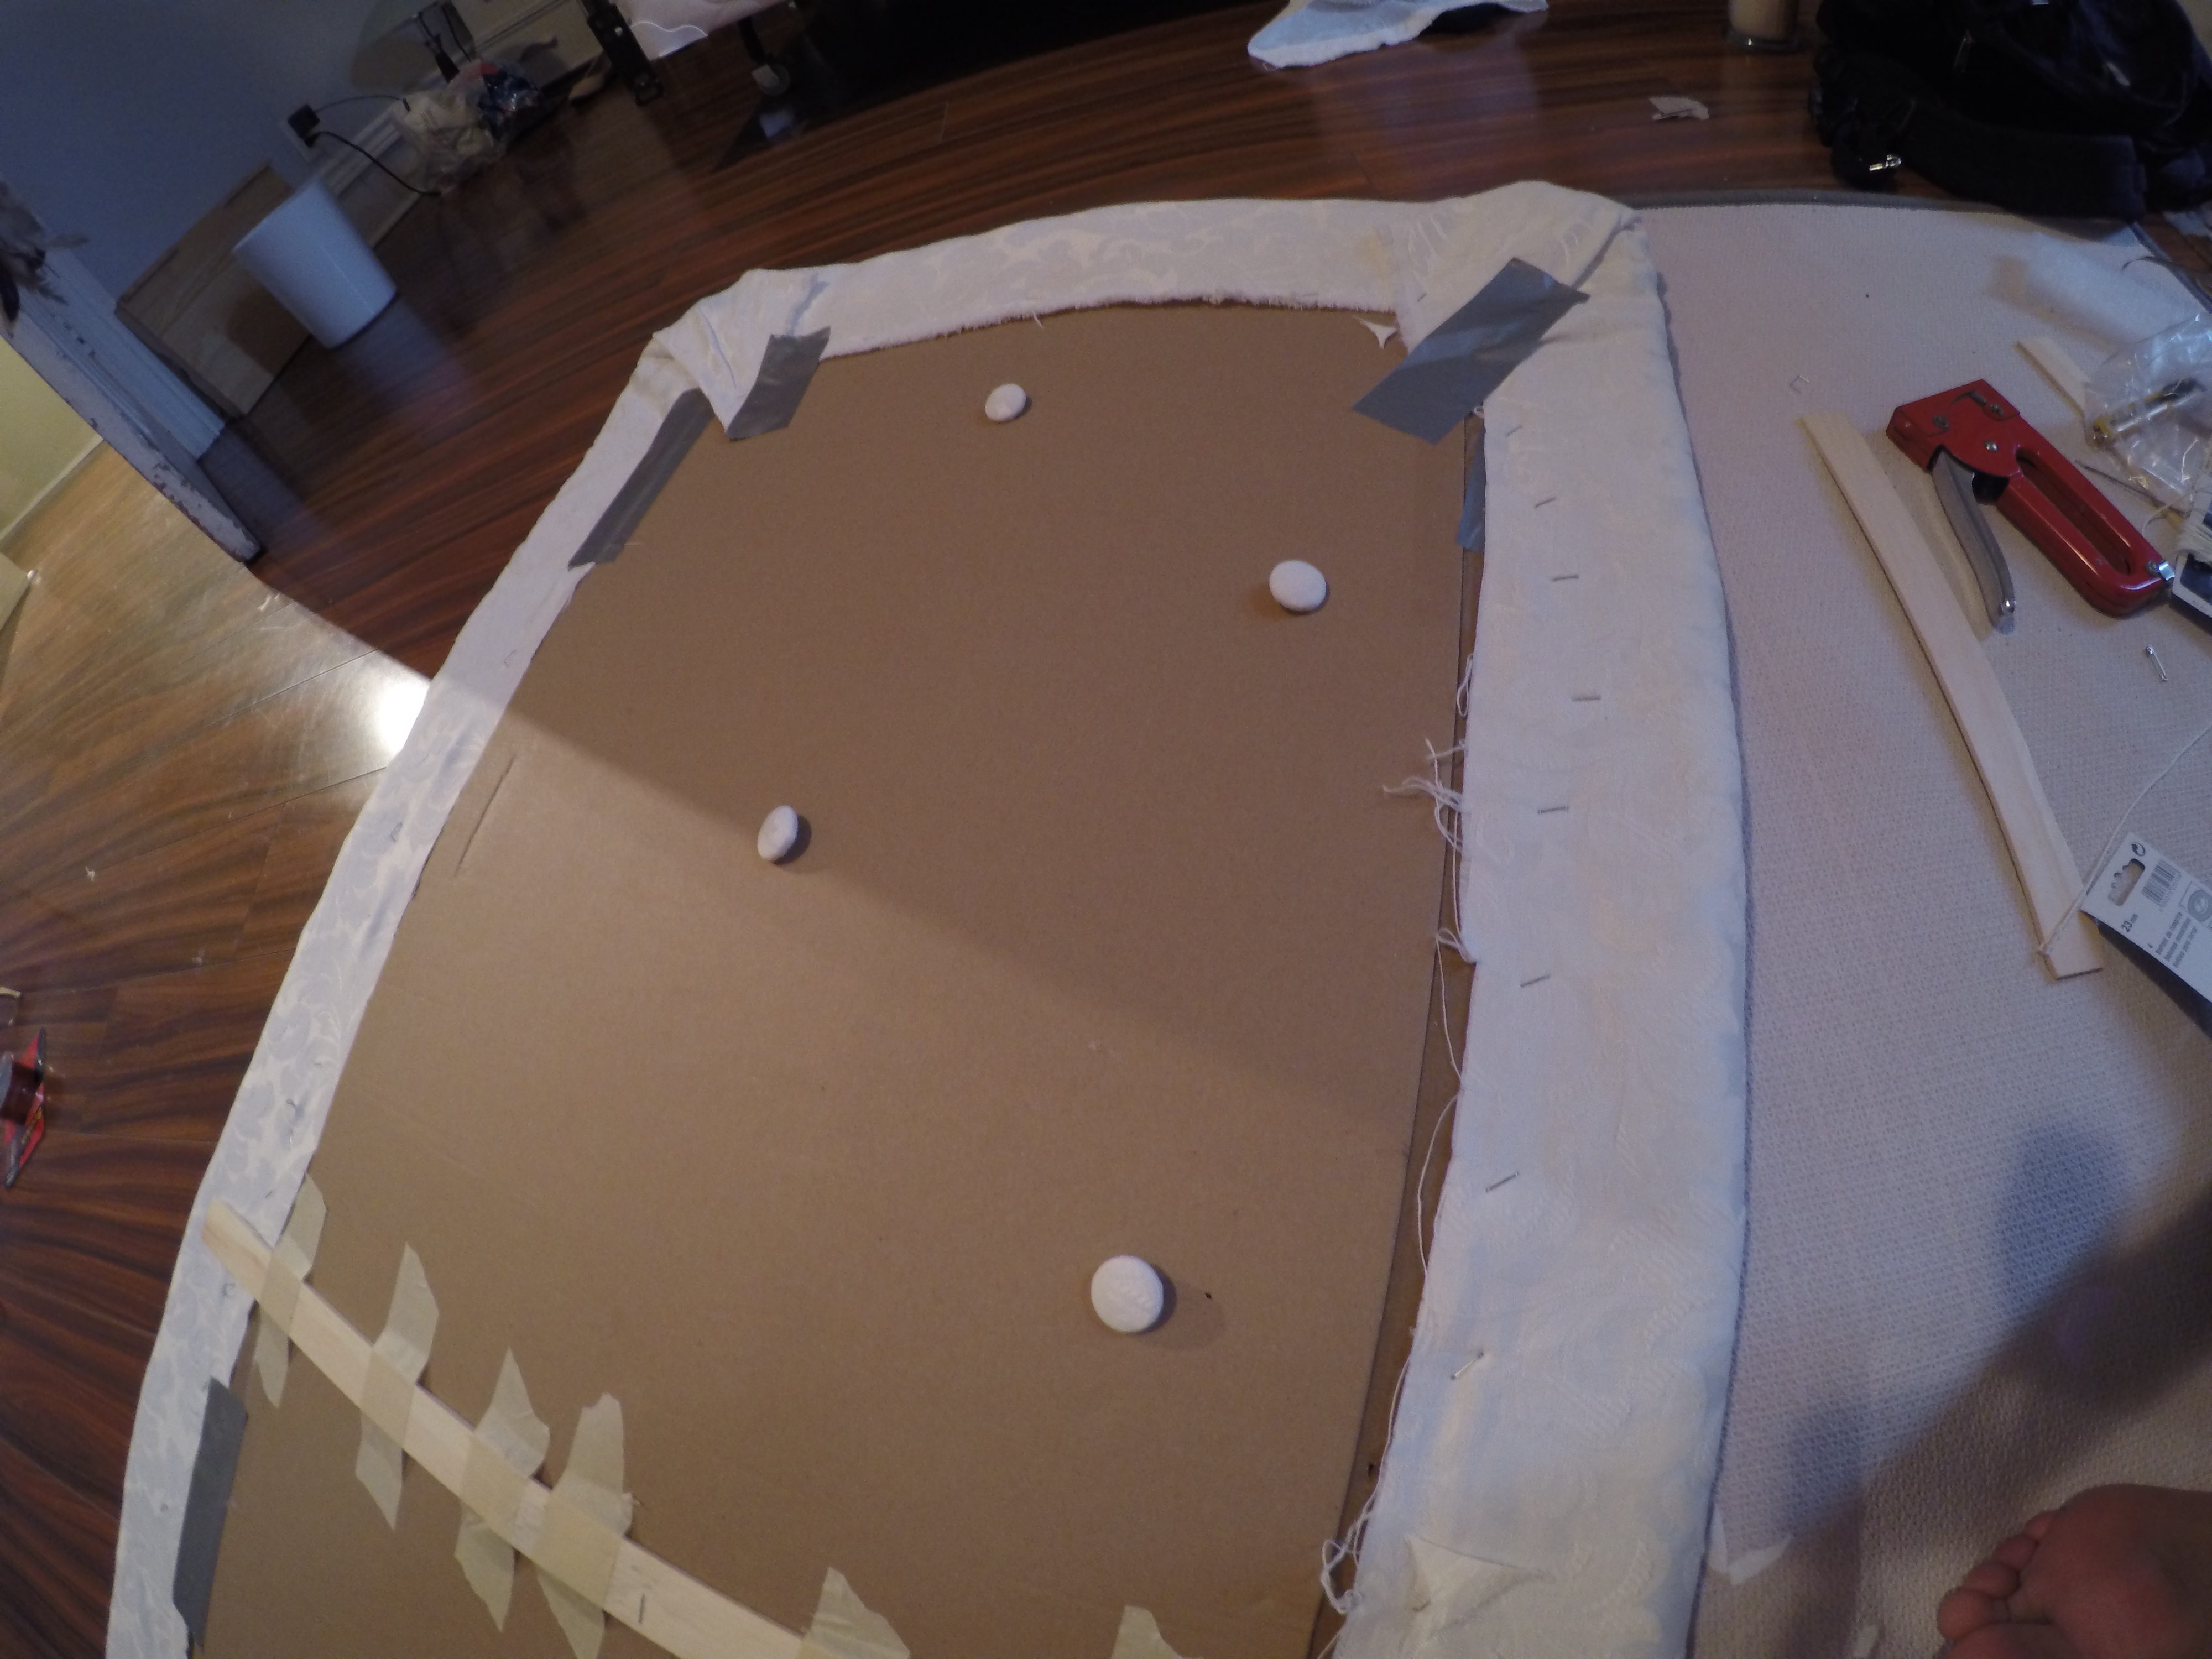
Step 4: Reinforce with wood
The cardboard was quite flimsy so I added some paint sticks to make a spine and reinforce the frame.
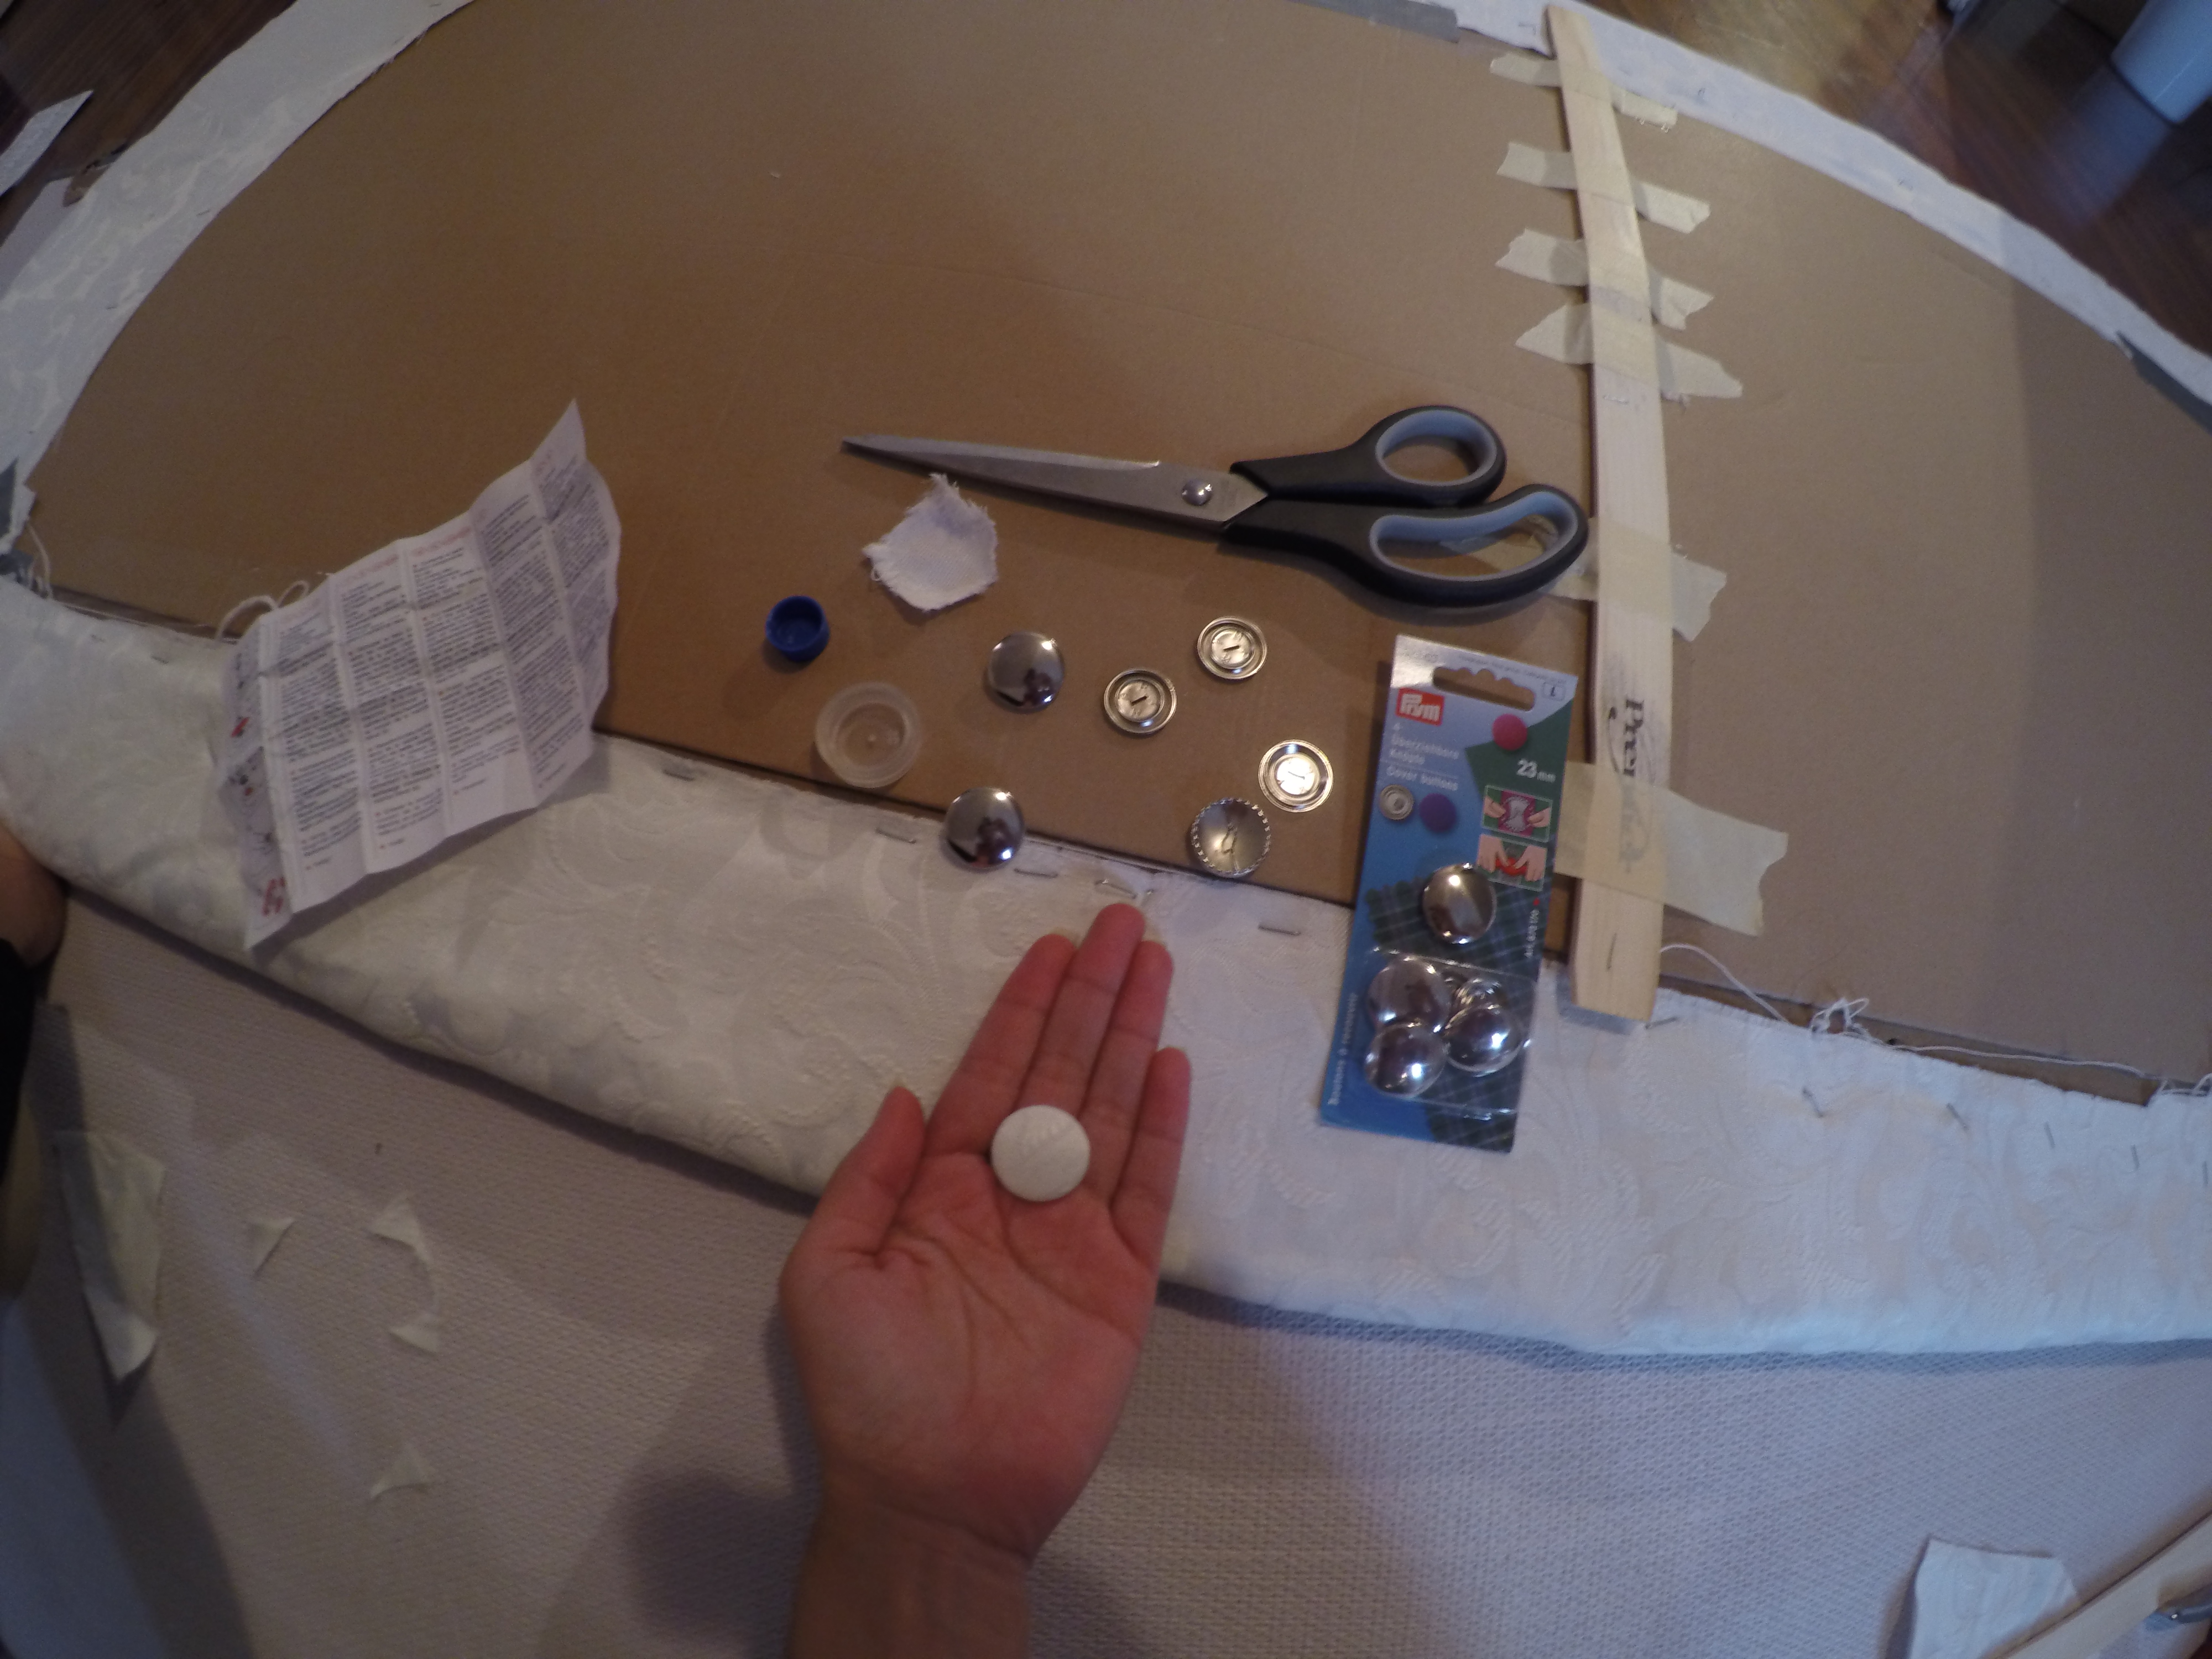
Step 5: Make buttons
This was one of the most challenging parts. I’ve never made buttons, and after I got the hang of button making, it wasn’t that bad.
Step 6: Lay out and measure button distance
This part was a bit challenging because I could not decide which pattern I wanted to use. I’m not going to lie: I also got stumped on the math and figuring out how to make the button pattern even. Eventually, I called my help line and figured it out!
Step 7: Sew buttons onto the cardboard
I bought some thick string and a big needle for around $3 and sewed the buttons in place.
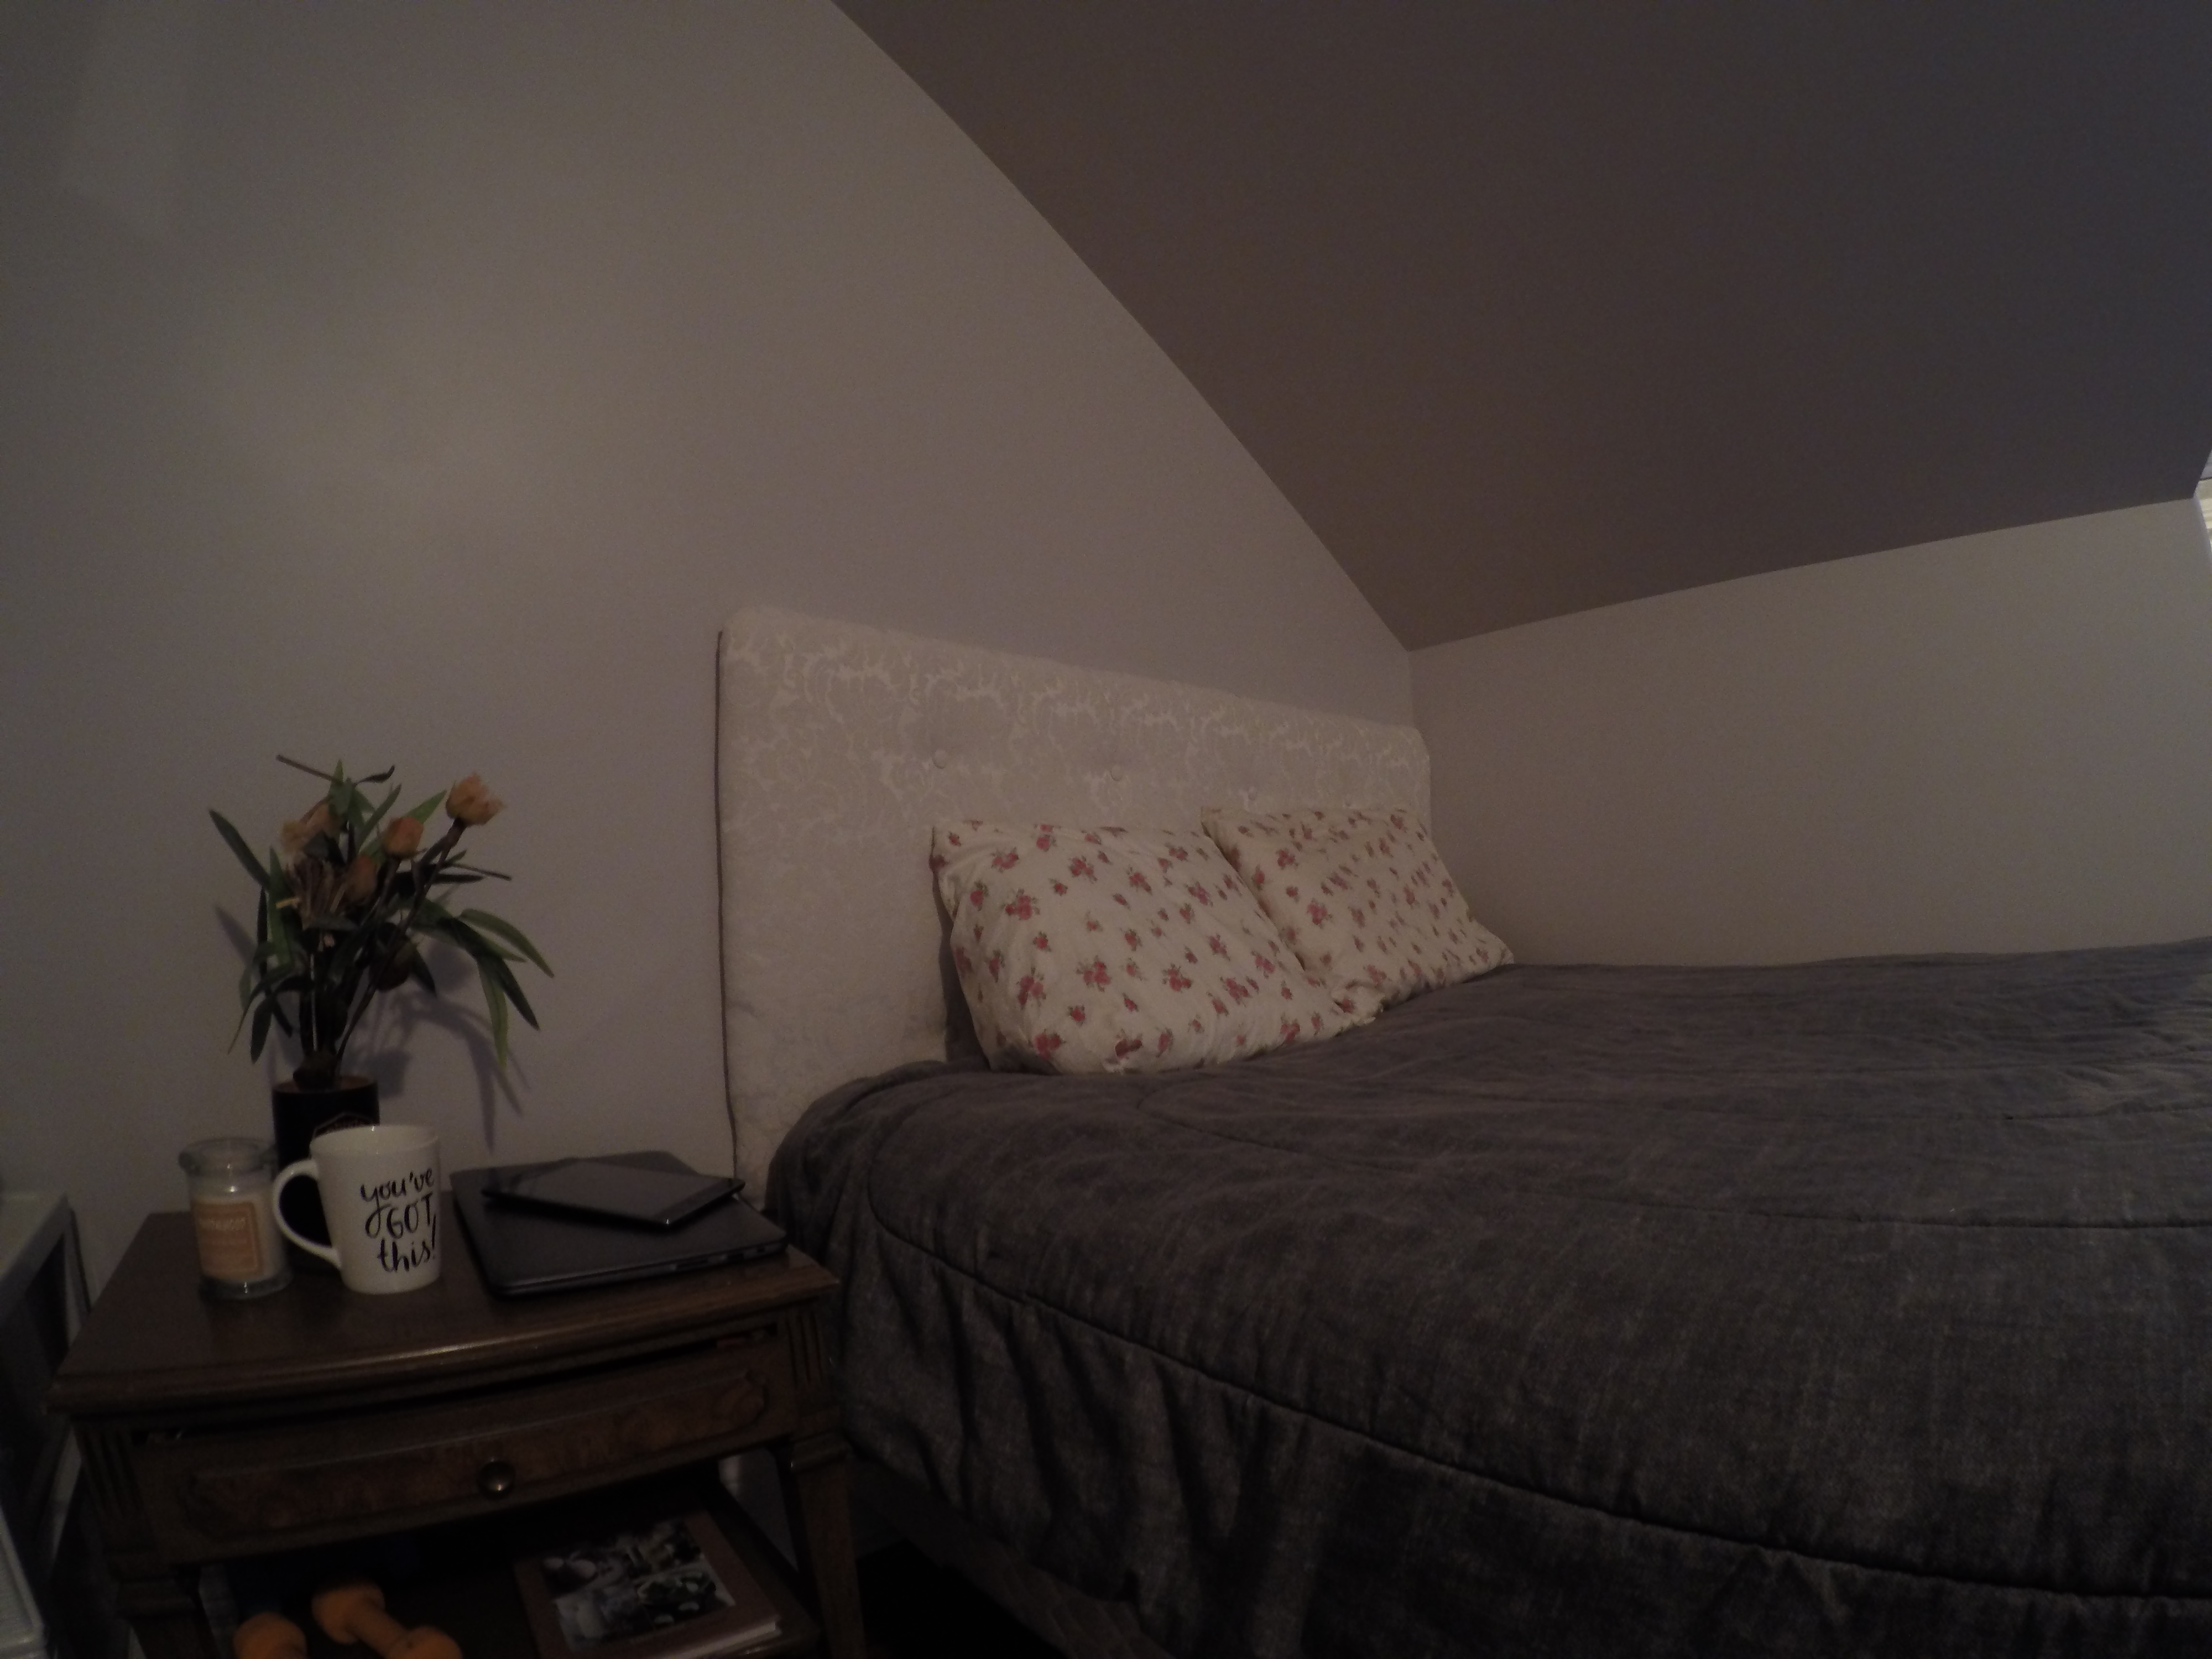
Step 8: Mount the headboard
There are a few ways to mount the headboard. Mine was so light, I used double sided mounting tape. So far, so good!
This project took about 3 hours to complete. Most materials can be found on Ottawa St N in Hamilton.